sw# Map Building & Processing Guide (Q9000 & Odin1)
English | 中文
Note
Although this guide uses the Unitree Go2 as a concrete example for file transfer and mounting height parameters, the map scanning, export, and PCD-to-PGM grid conversion workflow is completely platform-agnostic. It applies equally to any robot running ONS2 (such as ASTRALL SW01, Dobot Lumo, or custom mobile platforms) regardless of the specific robot model.
This document walks through how to build the three map files required by ONS2 (<map>.bin, <map>.pgm, and <map>.yaml):
- Sections 1–5 (Recommended): Offline Post-Processing via MindCloud Studio — using data captured by either a Q9000 scanner or an Odin1 module (
recorddata: 1). - Section 6 (Alternative): Onboard Online Mapping with Odin1 Only — saving
.binand.pcd/.pgmdirectly on the robot without MindCloud Studio, along with its practical limitations.
MindCloud Studio accepts raw mapping projects recorded by either a Q9000 scanner or an Odin1 sensor:
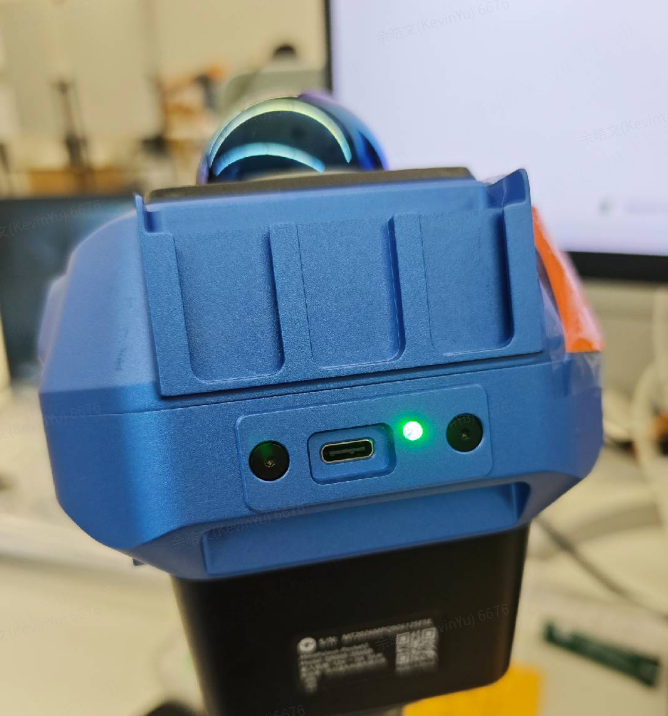
Connect a Type-C to USB-A or Type-C to Type-C data cable between the USB-C port on the back of the Q9000 head and your computer. Once recognized, a removable USB drive will appear on your computer containing the recorded .lx project folders.
If you do not have a Q9000, you can record a MindCloud-compatible project directly from Odin1:
- Edit
odin_ros_driver/config/control_command.yaml(inros_ws/src/odin_ros_driver/orros2_ws/src/odin_ros_driver/) and enablerecorddata:custom_map_mode: 1 # 1: SLAM mode recorddata: 1 # 1: Record RGB, odometry, and SLAM cloud in MindCloud (.olx) format
- Launch
odin_ros_driverand move the robot/sensor through the environment:# ROS 1 roslaunch odin_ros_driver odin1_ros1.launch # ROS 2 ros2 launch odin_ros_driver odin1_ros2.launch.py
- Stop the driver when finished, set
recorddata: 0back incontrol_command.yaml, and copy the recorded project folder fromodin_ros_driver/recorddata/<record_start_time>/to your workstation for MindCloud Studio post-processing (Section 2).
Tip
A workstation or laptop with a dedicated GPU is recommended for MindCloud Studio. Ultrabooks without a discrete GPU will process point clouds significantly more slowly.
Launch MindCloud Studio on your computer and follow the steps below. (Contact Manifold Tech support to obtain the appropriate MindCloud Studio installer and license.)
-
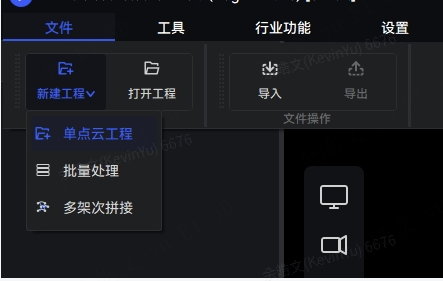
In the top-left menu bar, click File → New Project → Single Point Cloud Project (
新建工程 -> 单点云工程): -
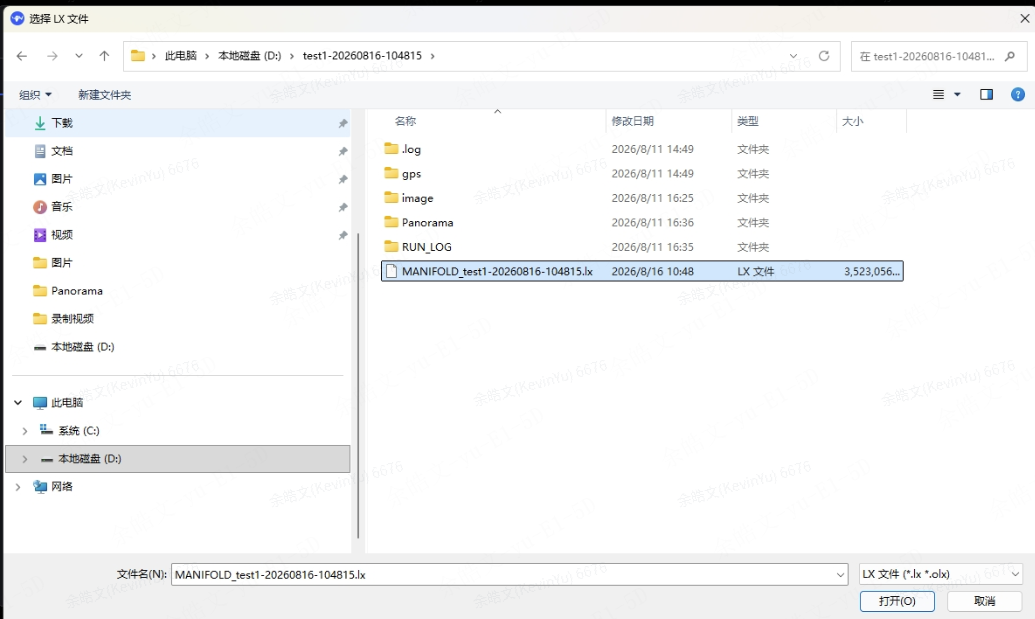
Select your recorded project folder from the Q9000 USB drive and open the
.lxproject file.
(Tip: Copy the project folder from the Q9000 USB drive to your local disk beforehand so the Q9000 battery does not run out during long exports.) -
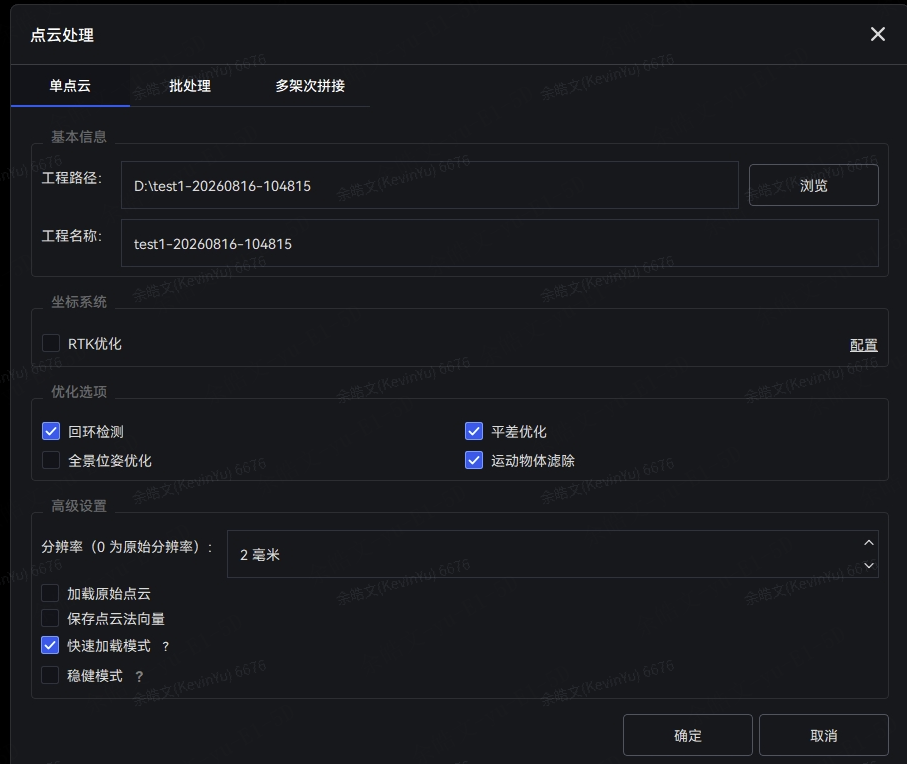
Configure the processing options in the pop-up dialog:
-
Wait for loading and processing to finish. If you do not need to archive a high-precision digital twin asset, enabling Loop Closure Detection (
回环检测) and Moving Object Removal (运动物体滤除) is sufficient—you can leave Bundle Adjustment (平差优化) unchecked for faster map generation.
Once processing completes, export two files:
.pcd— 3D point-cloud map (used to generate the 2D.pgm+.yamloccupancy grid for global planning).bin— Odin relocalization map
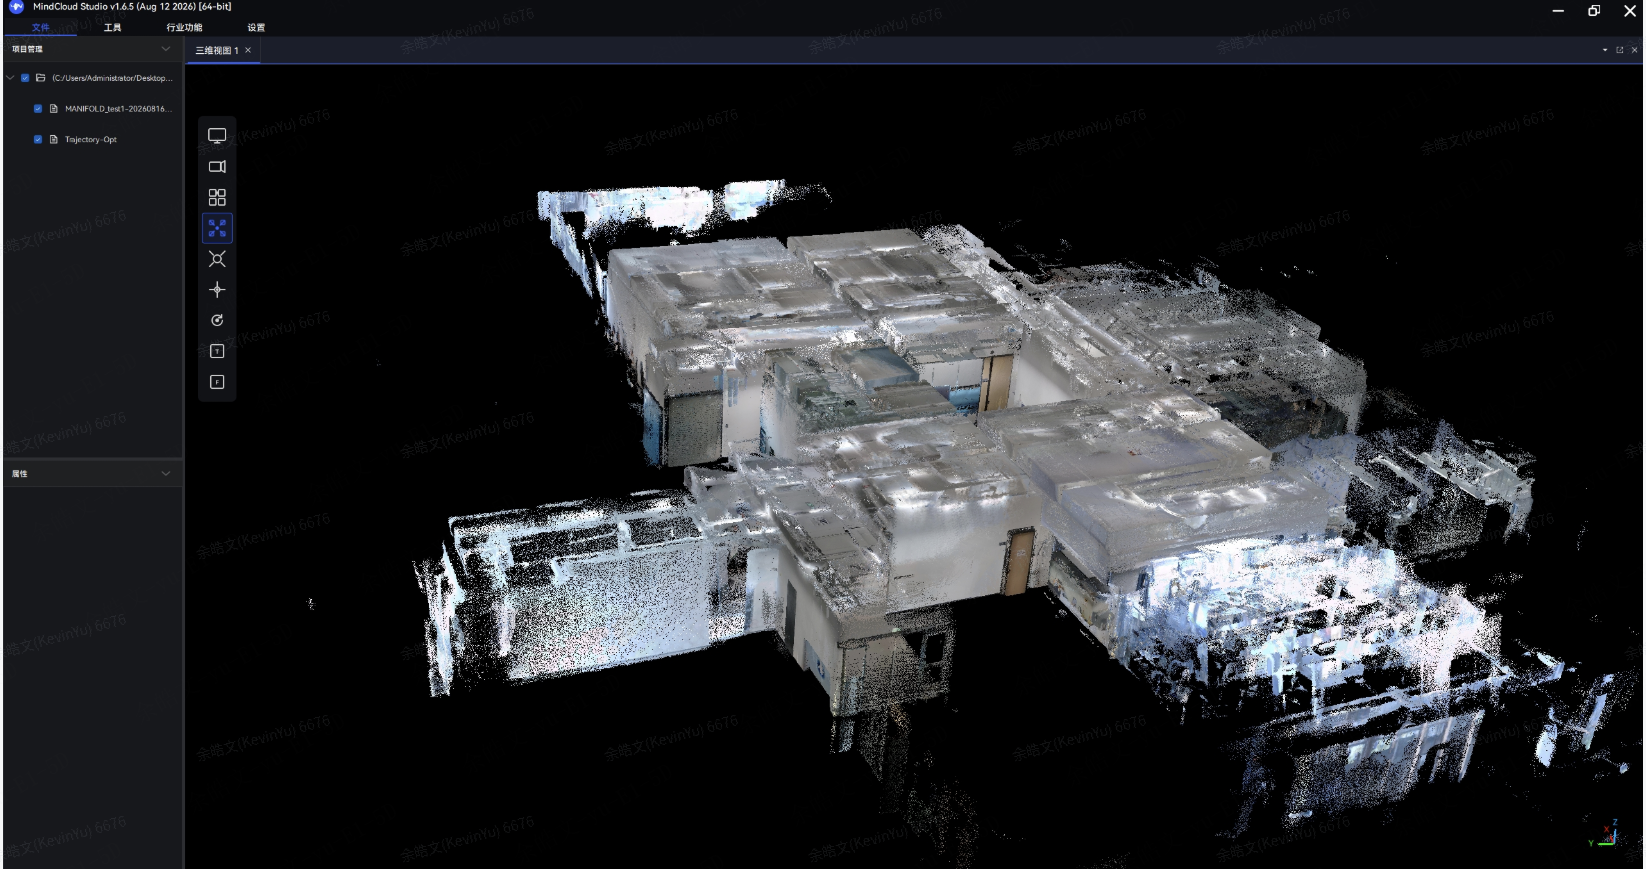
-
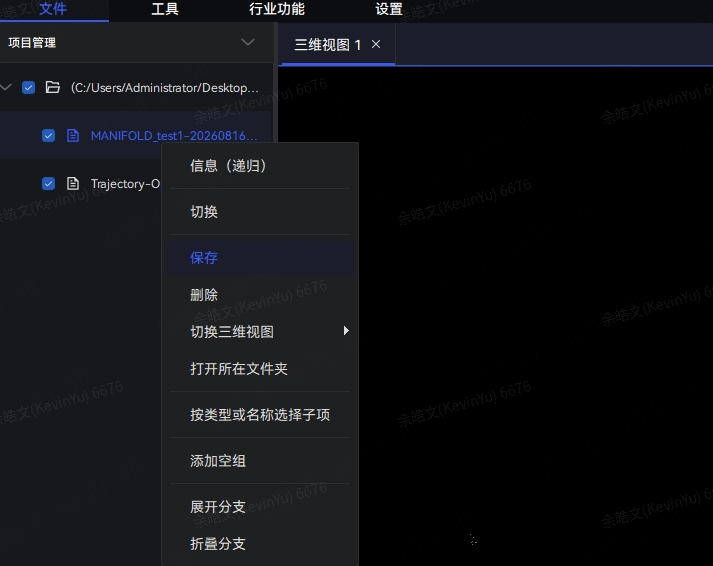
In the left project tree, right-click the point cloud item and select Save (
保存): -
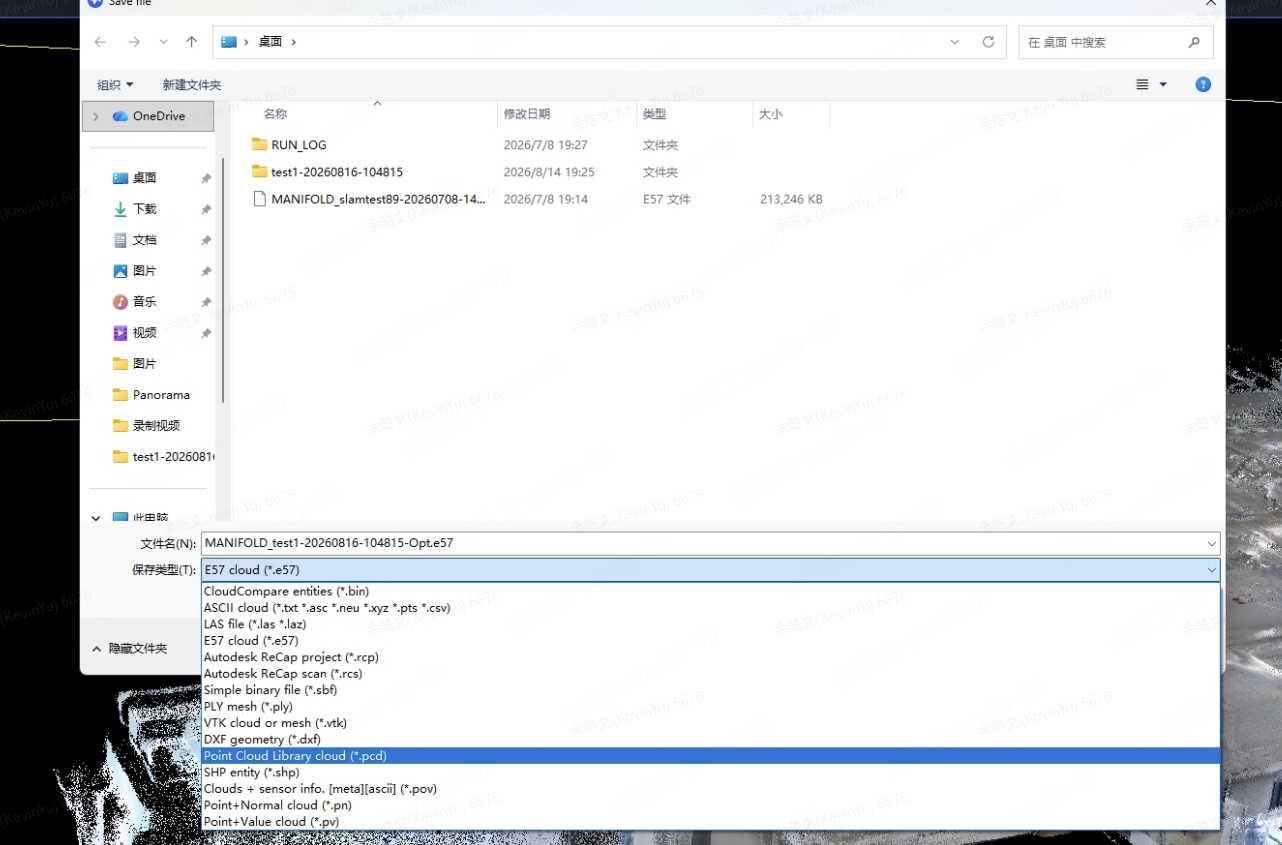
In the save dialog, set Save as type to
PCD cloud (*.pcd)and save it to your local folder:
-
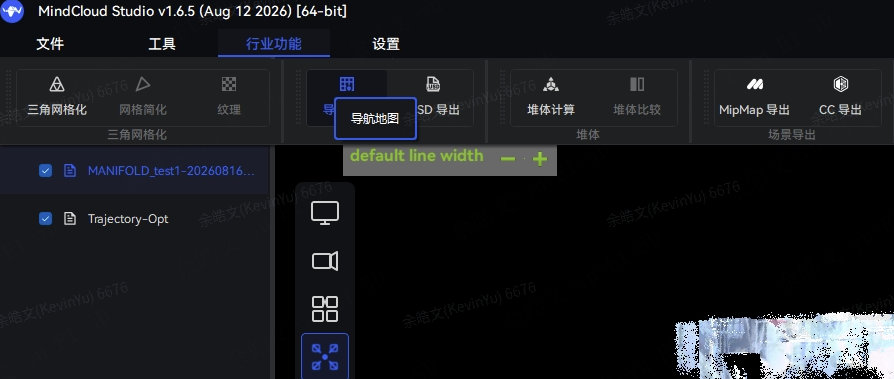
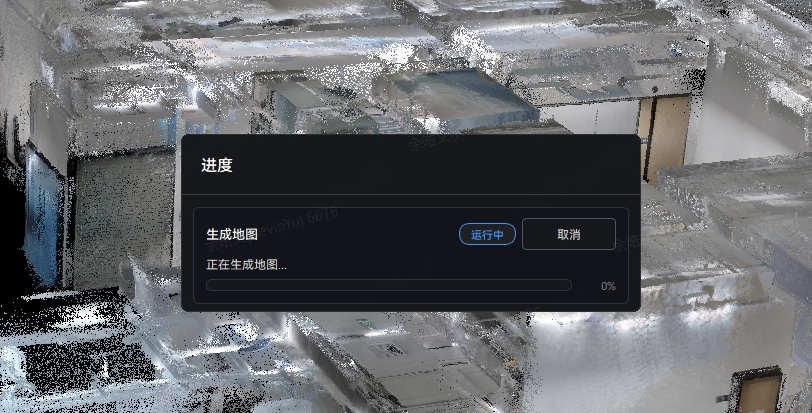
In the top menu bar, click Industry Features → Navigation Map (
行业功能 -> 导航地图): -
Wait for the navigation map export to complete (larger environments take longer to export):
-
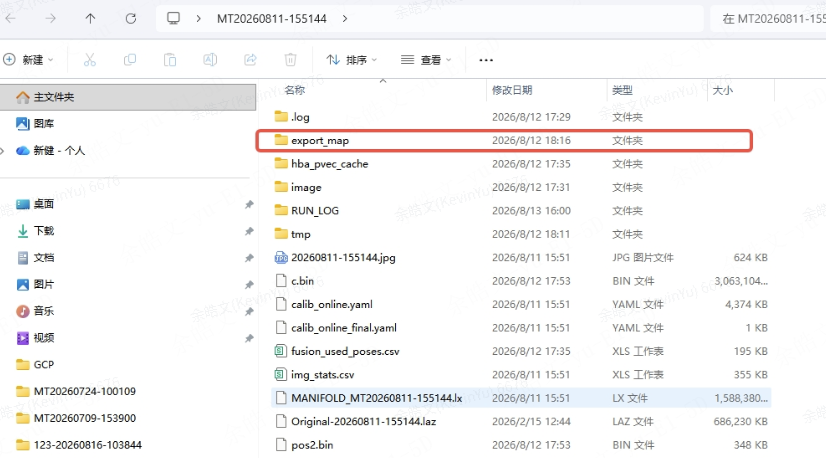
Once finished, the exported
.binfile is saved inside theexport_map/subfolder of your project directory:
Note
The commands below use a Unitree Go2 (192.168.123.18, user unitree, ROS 1 workspace ros_ws/) as an example. Replace the IP address, username, workspace path (ros_ws or ros2_ws), and --lidar-height with the values for your robot.
Important
The customer_file/ directory at the repository root (/path/to/base_inspection/customer_file/) is ignored by Git and does not exist in a fresh clone. You must create it manually before copying .bin files into it:
mkdir -p /path/to/base_inspection/customer_fileTransfer the exported .pcd and .bin files to your robot using either a USB flash drive or scp:
Option A — Via USB Flash Drive:
# Ensure customer_file/ exists at the repository root
mkdir -p /path/to/base_inspection/customer_file

# Enter the USB drive mount directory
cd /media/Upan

# Move the .pcd and .bin files to the navigation stack directories
mv parkinglot.pcd /path/to/base_inspection/ros_ws/src/map_planner/maps/parkinglot.pcd
mv parkinglot.bin /path/to/base_inspection/customer_file/parkinglot.bin

# Verify the files are in place
ls /path/to/base_inspection/ros_ws/src/map_planner/maps/parkinglot.pcd
ls /path/to/base_inspection/customer_file/parkinglot.bin
Option B — Via scp over the Network:
# First, create customer_file/ on the robot if it does not exist yet:
ssh [email protected] "mkdir -p /path/to/base_inspection/customer_file"

# Copy the point cloud (.pcd) to map_planner/maps/
scp parkinglot.pcd \
    [email protected]:/path/to/base_inspection/ros_ws/src/map_planner/maps/

# Copy the relocalization map (.bin) to customer_file/
scp parkinglot.bin \
[email protected]:/path/to/base_inspection/customer_file/Run scripts/map_processing/pcd_to_pgm.py (or copy it into map_planner/maps/) to project a height slice of the 3D .pcd point cloud into a 2D occupancy grid:
cd /path/to/base_inspection/ros_ws/src/map_planner/maps

python3 /path/to/base_inspection/scripts/map_processing/pcd_to_pgm.py parkinglot.pcd \
    -o parkinglot \
    -r 0.05 \
    --lidar-height 0.545 \
    --slice-above 0.3 \
--slice-below 0.2| Argument | Default | Description |
|---|---|---|
parkinglot.pcd |
(required) | Input .pcd file path |
-o |
Input stem | Output filename prefix; generates <prefix>.pgm and <prefix>.yaml. Note: the .pgm, .yaml, and .bin files should share the same base name. |
-r |
0.05 |
Grid resolution in meters/cell (0.05 recommended; increase to 0.1+ for very large maps) |
--lidar-height |
0.545 |
Sensor mounting height above ground in meters (0.545 is the default for Go2; adjust for your robot) |
--slice-above |
0.3 |
Height window above the sensor (m) retained as obstacles |
--slice-below |
0.2 |
Height window below the sensor (m) retained as obstacles |
How to pick the two height windows from your robot's height and sensor mount is covered in Tuning Guide §3.1b Point-Cloud Height Slicing.
The script produces two files in map_planner/maps/:
parkinglot.pgm    # 2D occupancy grid image
parkinglot.yaml   # ROS map_server metadata file
You can inspect parkinglot.pgm directly or clean up noise in an image editor such as GIMP (Section 4.4).
If the raw slice contains transient clutter or artifacts you want to erase manually, open the .pgm file in GIMP:
sudo apt install gimp
gimp
Drag parkinglot.pgm into GIMP:
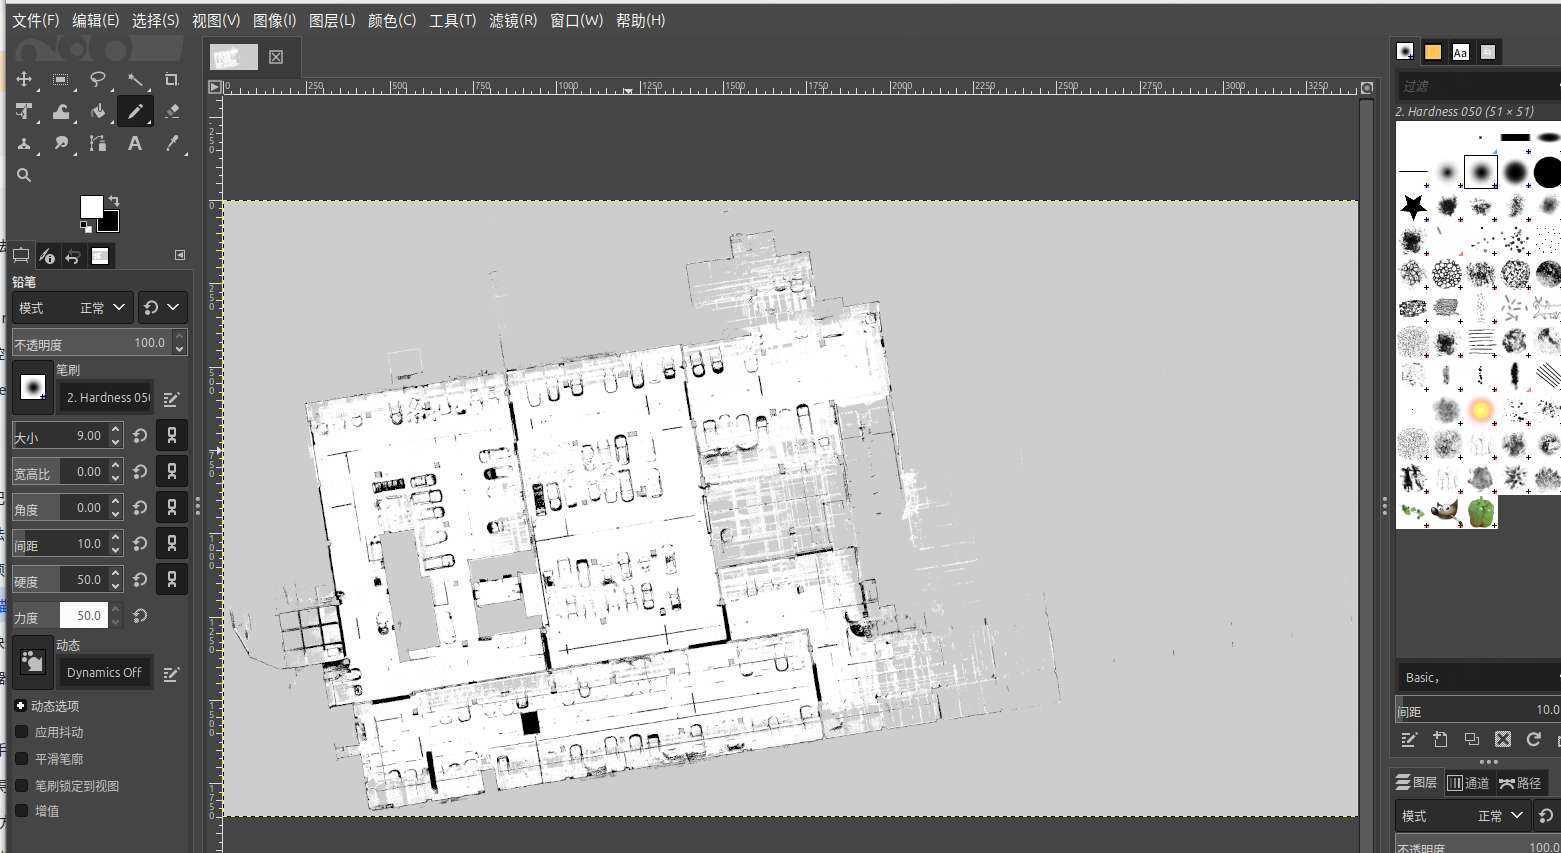
- Zoom / Pan: Hold
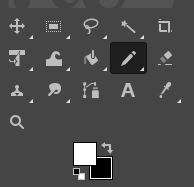
Ctrl+ scroll wheel to zoom; hold the middle mouse button and drag to pan. - Pencil Tool: Select the Pencil tool in the top-left toolbar (set Hardness = 100), and pick pure White or Black from the color palette:
- White = free traversable space
- Black = obstacle
- Gray = unknown / unexplored area
- Export: Click File → Export As..., export as
.pgm(raw/binary PGM), and overwriteparkinglot.pgminmap_planner/maps/(keepparkinglot.yamlunchanged).
Once the map files are ready, pass --map=<map_name> to the launcher script:
bash /path/to/base_inspection/scripts/ons2_go2.sh --map=<map_name>    # e.g., --map=parkinglot
# On ROS 2 (SW01): bash /path/to/base_inspection/scripts/ons2_sw01.sh --map=parkinglot
# On Dobot Lumo:   bash /path/to/base_inspection/scripts/ons2_dobot_lumo.sh --map=parkinglot
Here --map=<map_name> selects the built map by its base name. Every map consists of three files that must share the exact same base name (for example, parkinglot.yaml, parkinglot.pgm, and parkinglot.bin):
| File | Required Directory | Notes |
|---|---|---|
<map_name>.yaml |
/path/to/base_inspection/ros_ws/src/map_planner/maps/(or ros2_ws/src/map_planner/maps/ on ROS 2) |
2D map metadata (resolution, origin, thresholds) |
<map_name>.pgm |
/path/to/base_inspection/ros_ws/src/map_planner/maps/(or ros2_ws/src/map_planner/maps/ on ROS 2) |
2D occupancy grid image |
<map_name>.bin |
/path/to/base_inspection/customer_file/ |
Odin1 3D relocalization map (note: customer_file/ does not exist by default in a fresh clone—create it manually with mkdir -p /path/to/base_inspection/customer_file) |
For full mission control and patrol instructions after startup, see 01 · Quick Start.
For small indoor environments where offline post-processing in MindCloud Studio is not required, Odin1 can also save a .bin relocalization map and a .pcd point cloud directly on the onboard computer in SLAM mode (custom_map_mode: 1).
- Edit
ros_ws/src/odin_ros_driver/config/control_command.yamland setcustom_map_mode: 1. - Terminal 1 — Start the Odin1 driver:
source ros_ws/devel/setup.bash roslaunch odin_ros_driver odin1_ros1.launch - Terminal 2 — Run the mapping helper script:
bash scripts/map_processing/map_recording.sh <map_name>
- Press
[Enter]to start recording (/pointcloud_saver/start_recording), walk the robot through the site, and press[Enter]again to stop. - The script automatically calls:
bash ros_ws/src/odin_ros_driver/set_param.sh save_map 1(which triggers the Odin1 driver to write the relocalization.binmap toros_ws/src/odin_ros_driver/map/<driver_start_time>/map_<save_time>.bin);/pointcloud_saver/save_mapto save the accumulated.pcdpoint cloud;pcd2pgm+map_server map_saverto generateros_ws/src/map_planner/maps/<map_name>.pgmand<map_name>.yaml.
- Press
- Copy and rename the generated
.binfile intocustomer_file/:mkdir -p customer_file cp ros_ws/src/odin_ros_driver/map/*/*.bin customer_file/<map_name>.bin
(On ROS 2, call ros2 service call /odin1/save_map odin_ros_driver/srv/SaveMap "{value: 1}" to save the .bin file, save the .pcd via pointcloud_saver, and run scripts/map_processing/pcd_to_pgm.py as shown in Section 4.2.)
Compared to the MindCloud Studio workflow (Sections 1–4), onboard online mapping has three important limitations:
- No offline global optimization or dynamic-object removal: Pedestrians or moving objects seen during mapping are baked directly into the saved
.pcdand.pgmunless manually erased in GIMP (Section 4.4), and large loops do not benefit from MindCloud Studio's offline bundle adjustment. - Manual
.binplacement and renaming: The Odin1 driver writesmap_<save_time>.bininsideodin_ros_driver/map/<driver_start_time>/(unlessmapping_result_dest_dirandmapping_result_file_nameare explicitly configured incontrol_command.yaml). You must copy and rename it tocustomer_file/<map_name>.binso it matches<map_name>.pgmand<map_name>.yaml. map_recording.shis a legacy ROS 1 helper: The shell wrapperscripts/map_processing/map_recording.shrelies on ROS 1roslaunch/rosserviceand the ROS 1pcd2pgmpackage. For ROS 2 or multi-robot deployments, usingpcd_to_pgm.py(Section 4.2) with MindCloud Studio is strongly recommended.